Monday, November 5, 2018

Spring Boot and Spring Security

Let's now continue our Spring Boot journey by adding Spring Security. First we need to modify our pom.xml as shown below.


If we run our project this time, instead of displaying our page, Spring will redirect us to login page. At this point of time we haven't even created the login page.


So now we will create a login page as shown below. Here we use primefaces as our front end. We will learn it later. For now what we need to do is to make sure that the username is named "username" and password is named "password" as it is required by Spring Security.


Next we have to create a configuration class that extends WebSecurityConfigurerAdapter. We also have to annotate it with @Configuration and @EnableWebSecurity. These two annotations are used together to configure Spring Security. We then need to override the configure() method. Inside configure() method, we define login and logout url, resources that are permitted to access without any authorization, etc.


So now how do we compare username and password with the ones in database? That is the job of a password encoder. As shown below, there are two methods we have to implement, encode() and matches(). Method encode() is used to encode raw password while matches() is used to compare raw password and encoded one. Raw password is supplied by user input while encoded password is the one we fetched from database. Note that we use MD5 as our encoding algorithm.


Next question is how do we get username and password from database? And who gives that password to our password encoder above? That is the job of user detail service. This class implements UserDetailsService and annotated with @Service to make it a Spring service. Here we have to implement method loadUserByUsername(). This method makes a query to database to get a user if any, using supplied username. It then gets the user's roles which we can use later when we deal with authority in an html page. It then returns a Spring Security User object which has username, password, and roles. Next, Spring calls our password encoder class to compare the password.


Now we need to put them all together as shown below. In our WebSecurityConfigurerAdapter class, we have to create a bean of password encoder and object of type user detail. Method configureGlobal() bind them all together. So our WebSecurityConfigurerAdapter looks like this:


Now run the project and our login page will be displayed.


If authentication failed, an error message is displayed.


If succeed, an error is also displayed. This is because we haven't defined our default page.


To define a default page, we have to create a configuration class that extends WebMvcConfigurer. Method addViewControllers() needs to be implemented. In our case we make index.xhtml as the default page.


Now if we start the project again and successfully logging in, the index.xhtml will be displayed.


Sunday, November 4, 2018

Node.js

There are few steps we need to do to conveniently working on Node.js.

Install Node.js from its official website. This is the result in my Windows.


Since I'm a big fan of Eclipse, I want to be able to write Node.js code on Eclipse.To do that we installed an Eclipse package nodeclipse.


Next we install express framework using npm (Node Package Manager). Express framework is used to create a Node.js server. Actually we can create a Node.js server without express framework, but since everybody is doing it I think we will just do it :D


Now we will install nodemon using npm. Nodemon is a tool that restarts Node.js server when a file changes. By default, a changes will not be updated if the server is running. Without nodemon we have to restart it everytime we make changes.


Now it's time to create an Eclipse project. Choose to create a simple empty project. Two important files are created there, package.json and server.js. Package.json contains project information while server.js contains the Node.js server code.


Modify the package.json. Make sure the package.json contains "script"."start" "nodemon server.js" which means when we start Node.js server we use nodemon instead of just starting the server. This way when a file changes we don't need to restart the server. "dependencies"."express" and "devDependencies"."nodemon" must also exist.


Modify server.js as shown below.


Start it as shown below. If we modify server.js the server is restarted automatically.


Friday, November 2, 2018

Spring Boot and MyBatis

Integrating Spring Boot and Mybatis is quite easy. We will use our previous post as our base project. First, we need to add the following dependencies to our maven pom.xml as shown below. Note that we use PostgreSQL as our database.


We will use the following POJO without any annotation in it as shown below.


Next, create a package where we will put all of our Data Access Object files. Inside the package, create a Data Access Object interface and xml files as shown below.


The ICustomerDao.java contains methods required to interact with Customer data. In this interface we have an insert, an update, and a delete Customer method. Also, we have a method to get count of total Customer. We also have a method to get a Customer by its id. Note that we have the id annotated with @Param("id"). The id inside param refers to id that is used in xml file later. We also have a method to get a limited number of Customer (get Customer start from row offset for next limit number of Customer). Note that we also have them annotated with @Param. The interface itself is annotated with @Mapper, meaning it is a MyBatis mapper class.


Next we will see ICustomerDao.xml. Tag <mapper> defines the interface we created above.


Tag <resultmap> defines what object and its alias we want to return from a query. Here we have a Customer object inside package id.co.rhs.models and we give it an alias Customer. For each property in the class we map it to its database column. And since column ADDRESS_ID has relation one to one with class Address, we use <association> tag. The attribute select defines which statement in IAddressDao to get the address object. Other attributes are self explanatory.


Insert, update, and delete statements are very straightforward. The parameters are put inside #{}. Note that in the interface we pass object Customer and in the xml we just need to get its properties inside curly brackets.

Methods to get Customer are shown below. Here we set the resultMap as Customer even though the query returns more than one resultset. If we want to return a result other than our resultMap, we can use resultType. Here we return resultType integer for getAllCustomersCount method.


What about primary key? We can create a native PostgreSQL function to generate random string as shown below. Then in the customer table we set the primary key default value to be the generated string value.


Next we have to make a database configuration in application.properties as shown below. Here we have to define the driver class name, database url, database username and password. This application.properties file is saved in src/main/resources folder. Note that here we provide plain password. Next we will see how to encrypt this password.


To encrypt the password we have to create a method to encrypt and decrypt it. Below are our methods to do that.


Next we have to create a configuration class as shown below. Here we annotate the class with @Configuration and @EnableAutoConfiguration. @Configuration allows us to define a bean, in our case datasource bean for database connection. @EnableAutoConfiguration makes spring auto configuration enabled. We also have four variables annotated with @Value to get its value from application.properties file. A method named datasource() is annotated with @Bean and return a datasource object. We do this since we want to decrypt our encrypted password in application.properties file.


For testing, we will modify our App.java. Here we add @MapperScan annotation to make our dao package be scanned. We also have a variable ICustomerDao which we annotate with @Autowired. This makes Spring injection happens in that variable. We also make the App class implements Spring Boot's CommandLineRunner and implements its run() method. This method will be executed when Spring application is run. In our case it will get a customer by its id and print it on screen.


Our project structure now looks like this.


Below is the result running our code above.


Tuesday, October 23, 2018

Spring Boot and JSF

Integrating Spring Boot and JSF is quite simple. For this purpose, we will use joinfaces. First, create maven pom.xml and set the parent and the dependencies as shown below.


Next, configure spring boot application. Create a new class and give @SpringBootApplication class annotation. Also create a main method where we will call spring boot application as
shown below.


Next, create a jsf html page and put it inside src/main/resources/META-INF/resources/ source folder. The folder structure and file content is shown below.


Run the App.java and make http request on browser. The following output will be displayed.


Sunday, January 18, 2015

MongoDB and Java

Saturday, October 4, 2014

Android

For the last three months I've had a chance to play around with Android. As usual, I'd like to share what I've learnt so far. This link contains an Android project and its supporting projects. I also include a pdf as supprting documentation. I hope this is useful for anybody who wants to learn Android.


Sunday, June 15, 2014

JAAS Revisited (Using Database and Tomcat)

I have wrote a blog post about JAAS application using database on this post. Now we will expand it by writing those knowledge for a web application. First of all we will see our database structure. Since we will use the same database structure as previous post, there is no need to repeat it here. Also, we will use the same data but the application name and login module in table APP_CONFIGURATION. Below is the script to insert data to table APP_CONFIGURATION.


As we can see, instead of using DBLoginModule as previous post, we have a new login module class, TomcatLoginModule. Below is the code of our TomcatLoginModule.


As shown above, TomcatLoginModule extends DBLoginModule and overrides its commit() and logout() methods. This is done since we will introduce a new principal, RolePrincipal. We will visit the RolePrincipal class later and explain why we need this. In the code above, we add "admin" RolePrincipal to a user that has SysAdminPrincipal principal or "user" RolePrincipal to a user that has UserPrincipal principal. In the logout() method, we simply remove the RolePrincipal that was assigned.

Next we will visit the web.xml file. In this file, we define a servlet named StartupServlet to initialize JAAS configuration and policy as shown below:


Since its load-on-startup value is positive, which is set to zero, it is loaded by servlet container when the application is deployed. The servlet container executes servlet's init() method when it is deployed just once for the servlet lifetime; and since there is only one instance for each servlet on the container, it is save to put JAAS configuration initialization in the init() method. Below is our code to configure JAAS on StartupServlet.


In the code above, we set JAAS configuration, populate permissions, set JAAS policy, and set the security manager. We already see the JAAS configuration and policy in previous post so we won't repeat them again here. Next we will see how to populate permissions.


In the code above we have a static variable permissionMap which is used to save mapping of principal class and its permissions. It is populated from table PERMISSION and PRINCIPAL_PERMISSION. The static permissionMap is then used to get permissions based on principal class name in DBPolicy as shown below.


Let's go back to the web.xml to see how security is implemented to protect pages. In this simple web application we have two roles, admin role and user role. Each role has access to its own pages. Below is the folder structure where those pages are placed in Eclipse project.


All admin pages are put inside admins folder while all ordinary user pages are put inside customers folder. Other JSP files are self-descriptive. Below is the web.xml file that contains security configuration.


First, we have login configuration. We configure it to use html form based configuration and JAAS realm which we will configure later on Tomcat. We also set the login and login error page.


Next we set up the security constraint and security role. We have two roles, admin role and user role. All pages under admins folder can only be accessed by admin role while all pages under customers folder can only be accessed by user role.


We also set the welcome page to be index.jsp for web context, admins, and customers. If a user accesses a page that is not intended for him/her, for example if a user that has user role tries to access admin page, security error code 403 access denied is thrown by security manager. We will forward the user to the access-denied.jsp.


As we can see from the flow above, index.jsp is our entry point and from there we can go to admin page, user page, or logout page. If a user clicks the link to go to admin page, the security manager will check if he/she has already logged in. If yes, it will check if he/she has admin role. If he/she doesn't have admin role, he/she will be redirected to access-denied.jsp. If he/she has not logged in, he/she will be redirected to login.jsp. If the login process fails, he/she will be redirected to login-error.jsp. If he/she has logged in as admin, he/she will be redirected to admin page. The same logic applies to user role as well. Below are the jsp files involved in these scenario.


The login.jsp is the user interface we need to gather credentials. We have a form with action value j_security_check. We also have two textfields to input username and password. The textfields must be named j_username and j_password. Those names are mandatory if we want to take advantage of JAAS.

As mentioned before, we configure JAAS to use html form and JAAS realm. We have seen the html form on login.jsp, so now it's time to see the JAAS realm configuration on Tomcat as explained below.


Above is the default Tomcat configuration on its server.xml which is located in its conf folder.


The Tomcat configuration above is added automatically when we deploy our web app on Tomcat from Eclipse. The docBase and path properties point to our project name on Eclipse which is usually also our war file name and context name. The source property is internally used by Eclipse.


Then we need to add JAAS realm as shown above. The className property refers to internal Tomcat JAAS realm implementation. The appName refers to our package/application name in database. The roleClassNames is a class that is used by JAAS realm to decide what role that a user is assigned as configured on security constraint part of web.xml. We will see the RolePrincipal class later. useContextClassLoader is used to tell Tomcat that the RolePrincipal class should be loaded from context classpath, that is from /JAASWeb.

Below is the RolePrincipal class. It has the same structure as other principal classes. The name variable is set by TomcatLoginModule.commit() method and it has value either admin or user.


Once we have done with authentication, we can start authorization process. Unfortunately, we can't get the logging in Subject from authentication process that was done by JAAS realm before. We can overcome this by repeating the authentication process in a servlet Filter. Let's see how this is done below:


First, we declare two filters in the web.xml, Authentication-Filter and Authorization-Filter. The first is used to repeat the authentication process until we get the Subject. The second is used to simulate authorization process by checking the Subject privilege against an input file. We will visit them one by one.


For Authentication-Filter we create AuthenticationFilter class and pass "ted" as its app-name parameter. Our AuthenticationFilter class implements servlet's Filter interface. In the init() method we get the app-name parameter from web.xml. In the doFilter() method we get username and query his/her password from database. If the authentication process success, we put the Subject in to a session attribute "loggedInSubject".


For Authorization-Filter we create AuthorizationFilter class. In the code above we test the Subject against an input file.

Below is the folder structure of our project:


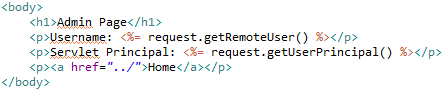
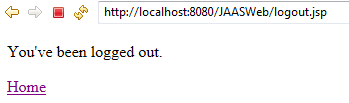
Running this project on Tomcat produces the following results:


©2009 Stay the Same | by TNB